Jason Lezak’s Gold Medal Delivery!

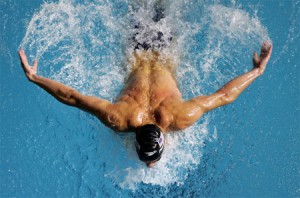
BEIJING - AUGUST 11: Jason Lezak of the United States celebrates finishing the Men's 4 x 100m Freestyle Relay Final in first place and wins the gold medal held at the National Aquatics Center on Day 3 of the Beijing 2008 Olympic Games on August 11, 2008 in Beijing, China.  (Photo by Adam Pretty/Getty Images)

Jason Lezak of the United States celebrates finishing the Men’s 4 x 100m Freestyle Relay Final in first place and wins the gold medal held at the National Aquatics Center on Day 3 of the Beijing 2008 Olympic Games. (Photo by Adam Pretty/Getty Images)

If you’re a triathlete and interested in improving your swimming, signing up for a Master’sswim meet is a great way to do it.  For one thing, no one is better at swimming than the swimmers!  There’s so much swim talent in this country, you’re likely to see some great performances, and you’re likely to meet some very cool people too.  US Master’s Swimming is an amazing organization, so I thought it was extremely cool to see Olympic Medalists Jason Lezak and Emily Silver showing up for a relay at the Master’s National Championships.  It’s great to see Olympians giving back to the sport, and it’s also great to see the enthusiasm they generate among other athletes.  So if you’re looking to improve your swim split, see some fast swimming, or just have a great time, find a Master’s meet near you and dive in!  You never know who might show up!

Happy Training,

Coach Land

Triathlon Tips From Ironworks Multisport: Finis Agility Hand Paddles

Finis Agility Hand Paddles

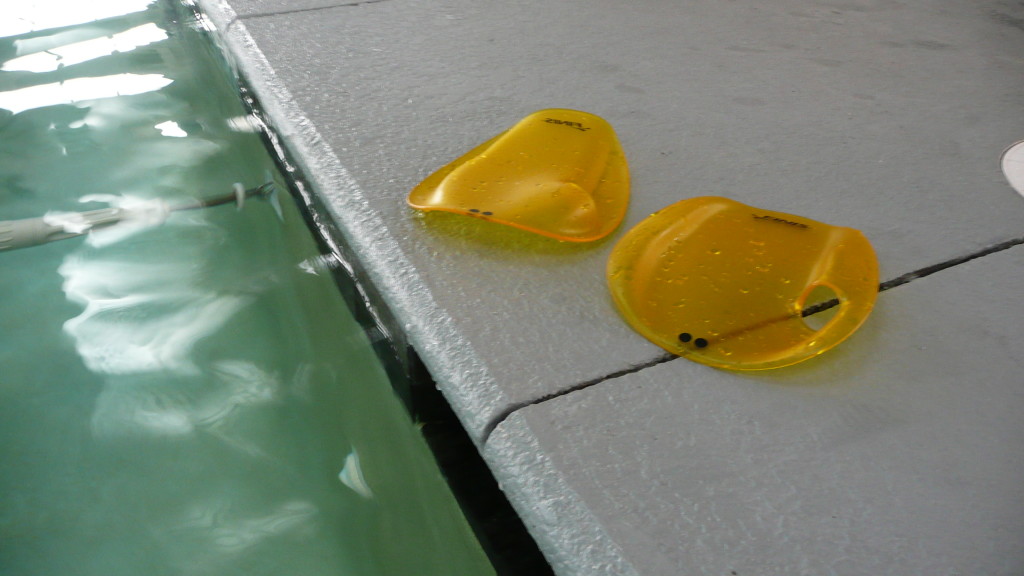
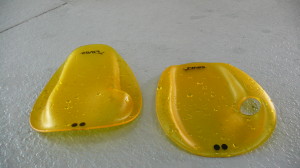
As a life long swimmer, and triathlete and swim coach for 15 years, I’d thought I’d seen pretty much every possible variation on hand paddles, but the Finis Agility Paddle is something entirely new.  So what makes it so different?  As you can quite easily see, they have no straps.  Instead, there’s a hole in the paddle which you put your thumb through, and then apply light pressure to hold the paddle in place. This strapless design has two main benefits.  First, there are no straps to degrade and eventually break.  Second, you must use the pressure of the water to keep the paddles on your hands.  As a coach, the second is what makes these paddles so exciting.  I’m constantly telling my swimmers that their hands should enter the water cleanly, catch early and with a high elbow, and to strive for an early vertical forearm.  These hand paddles encourage all of these traits; you don’t even have to think about it, you just feel it.  And if you have faulty technique you get immediate feedback because the paddles will just fall off!

The first time I tried these paddles out, I was a little unsure about how well they would perform, and they did feel different from a conventional paddle.  However, I didn’t have any problems keeping the paddles on, and after a few laps they began to feel completely comfortable and natural.  I experimented a little and tried to lead with my elbow for a few strokes, and as expected the paddles immediately came off.  Another great thing about these paddles is that they can be used for all four strokes.  They are equally comfortable for butterfly, backstroke, breaststroke, and freestyle.

Finis Hand Paddles

I would find these paddles suitable for all swimmers, especially younger age groupers and triathletes who constantly need to focus on form and technique.  Beginners will find them valuable because of the constant demand for an early vertical forearm, and advanced swimmers can benefit from using them for long sets where technique can sometimes falter.  If you’re looking for a great new paddle to help you perfect your swim technique and improve your swim splits at the races, I’d highly recommend giving Finis Agility Paddles a try.  Thanks for reading my triathlon tips, please check back soon for lots more information on triathlon and swim training!


Beginner Triathlon Tips: Top Swim Paddles Compared by Olympic Gold Medalist Mark Gangloff

Swim Paddle ReviewThinking of getting some new swim paddles?  Then be sure to check out The Gangloff Review by Olympic Gold Medalist Mark Gangloff at SwimOutlet.com!  He compares 15 popular swim paddles and offers some great tips and insight.  If you’re looking for some new paddles and can’t decided which ones are the right for you then this is definitely worth reading.  And while you’re here at IronworksMultisport.com, please check out the new Ironworks Store feature at the top of this page to stock up on all your swim gear.

Happy Training!

Coach Land

K-Swiss Kwicky Blade Light: The Ironworks Multisport Review

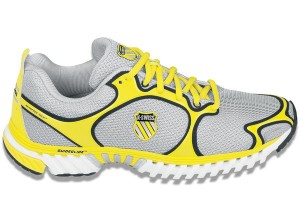
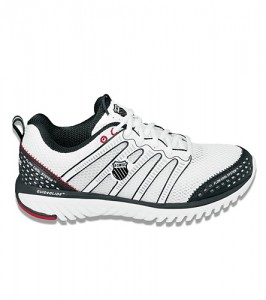
After 14 years as a triathlete, I know pretty much all there is to know about blisters.  I’ve finished races where my white shoes have been turned red and I’ve spent days hobbling around on mangled feet.  I think I had blisters of some sort after nearly every race, until I started racing in the K-Swiss Kwicky Blade light.  It’s without a doubt the most comfortable shoe I’ve every raced in before.  The upper is made of one single piece of ion mask hydrophobic material, so even as you sweat and pour water over your head during a race or hot workout, the shoes stay dry.  Top that off with the light weight and responsive feel, and you’ve got a perfect shoe for racing and fast paced training.  I’ve even done some of my long runs in them and been perfectly comfortable.  And you don’t have to take my word for it, Leanda Cave wore these to victory in Kona this year.  So if you’re looking for the ideal shoe for racing, fast training runs, and ultimate comfort, look no further!  Pick up a part of K-Swiss Kwicky Blade Lights and run fast, comfortable, and blister free.

Triathlon Tips: Height to Weight Ratios of Women’s Triathlon World Champions 2001-2010


Some time ago, I started a little project to analyze the height to weight ratios of some of the  world’s best triathletes.  I got interested in this because of the old rule for runners that states that a runners race weight should be 2 pounds per inch of height.  Simply put, if you’re 6 feet tall (72 inches) you should weight 144 pounds (72×2=144).  That’s pretty lean when you think about it, but it actually holds true for many of the worlds best runners.  But triathletes have to carry a lot of extra muscle to swim and bike!  So what’s the “ideal” ratio for triathletes?  The results are actually pretty surprising and are slightly different for men and women.  If you check out my old post on elite men’s height to weight ratios you’ll notice that Ironman athletes tend to be a little heavier than ITU athletes.  It’s the reverse for the women, although that could mainly be due to the narrowness of the sample that I’ve used.  I’ve calculated the height to weight ratios for women’s world champions in Ironman and Olympic distance racing below.  Please note, this is only the best info I could find on the internet so I can’t guarantee the accuracy!  Also, you’ll see that there is a pretty side variation in heights and weights even among world champions, so it’s not really possible to claim that there’s one “ideal” ratio, and please don’t go and try to loose weight just because you’re not as thin as Chrissie Wellington!  The most important thing for all athletes is to do the best you can with what you’ve got.

ITU World Champions 2001-2010:

Nicole Hackett: 5’5″, 123 lbs.=1.89 pounds per inch of height

Siri Lindley: 5’0″, 128 lbs.=2.13

Leanda Cave: 5’11″/127 lbs. =1.78

Emma Snowsill: 5’3″/108 lbs.=1.71

Sheila Taormina: 5’3″/119 lbs.=1.88

Vanessa Fernandes: 5’6″/126 lbs.=1.90

Helen Tucker: 5’6″/121 lbs.=1.83

Emma Moffat: 5’7″/126 lbs.=1.88

Average: 1.87

Ironman World Champions 2001-2010:

(*No available information for Lori Bowden)

Natasha Badmann: 5’5″/110 lbs.= 1.69

Michellie Jones: 5’11″/132 lbs.=1.85

Chrissie Wellington: 5’7″/132 lbs.=1.97

Mirinda Carfrae: 5’3″/114 lbs.=1.81

Average: 1.83

Thanks for reading!  Please check back soon for more articles on training and racing from Ironworks Multisport!


Beginner Triathlon Tips: Open Water Swim Training Tips For Triathletes

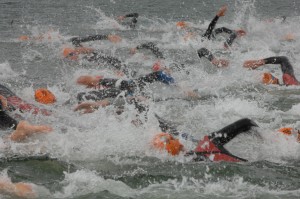
For many triathletes, the swim can be the most challenging and intimidating part of the sport, especially in the open water. The chaos of the swim start, the fear of getting pushed under, kicked in the face, or inhaling a lungful of water can all make for an anxious situation, even for experienced triathletes. The good news is that through preparation and training, and the use of some specific drills, you can prepare for these challenges and take a lot of the fear out of the swim.

First of all, what are some of the variables that triathletes need to prepare for? Open water swimming is different for a number of reasons, including the following: Lack of visibility, deep water where you can’t touch the bottom, no walls to push off every 25 or 50 meters, and contact with other swimmers. These are things that most swimmers don’t encounter in their day to day training, but you can simulate them with the following drills and games.

1. Head up freestyle: This drill helps to prepare you for the demands of having to sight off buoys while you swim. Having to lift your head every 5-10 strokes will use a lot of unfamiliar muscles, leading to fatigue which can also affect your performance on the bike and the run. To perform this drill, swim with your head out of the water with your eyes up, looking directly forward. Keep your chin just above the surface and don’t turn your head to the side to breathe. It helps to place something to focus on at the end of your lane, like a traffic cone. If possible, get a friend to move the traffic cone after each lap so you have to re-orient yourself a little. You can do 6-12x25m repeats of this drill with 10-15 seconds rest
after each 25, or you can include it in a longer swim. For example, you can swim a 400 and do every 4th lap head up freestyle.
2. Eyes closed freestyle: Please be careful when swimming this drill! Use caution and make sure that you don’t swim into the wall or the lane lines. For this one you will swim with your eyes closed, and only open them when you lift your head to sight. Sight every 5 or six strokes. This drill will help you to become more accustomed to the disoriented feeling of swimming in water with low viability. Also, this is best to do when you have a lane to yourself. Don’t do this in a crowded lane when you may risk injuring yourself or another swimmer.
3. Open water turns: These are simple to do, just turn a couple of feet before you hit the wall so that you don’t get any push off. Each wall gives you more of a break than you really realize, as you get to glide for a couple of seconds after each push off. This means that you get 2 seconds of rest in a 50, 6 seconds in a 100, etc. Doing open water turns will force you to exert continuous effort over the entire distance you swim, more like an actual open water swim.
4. Musical pull buoys: The rules for this game are similar to those of musical chairs. To play, you’ll need someone on the deck, and at least four or five swimmers in the water. The person on deck goes to the opposite end of the pool and tosses in one less pull buoy than there are swimmers (for example, with five swimmers, you throw in four buoys). The swimmers then sprint to the other end, each one trying to grab a buoy. The swimmer who ends up without a buoy sits out the next round. Keep playing until there’s only one swimmer left. This game gets you used to swimming in a group, and dealing with
contact in the water.
5. Drafting: You’ll need at least two swimmers for this drill. Drafting is a huge part of good open water swimming, and you can save a significant amount of energy by getting onto the feet of a swimmer who’s moving at a pace close to yours. However, drafting efficiently takes some practice. You want to be almost close enough to touch the toes of the swimmer you are drafting, but be careful because if you get too close and start grabbing their feet you risk getting kicked in the face. To practice drafting, line up at the wall and push off close together. The swimmer who is drafting should try to get onto the feet
of the person in front as soon as possible. You can alternate 25’s with each swimmer taking a pull and each getting a chance to practice drafting. You can also rest after each 25, or you can swim a continuous 200, 400, or longer and take turns drafting.
Give these drills a try during your upcoming swim sessions and watch your open water times improve.  I hope you’ve enjoyed this edition of Beginner Triathlon Tips, thanks for reading!  Have fun, and as always, train happy!

Triathlon Tips From Ironworks Multisport: Is A Professional Bike Fit For You?

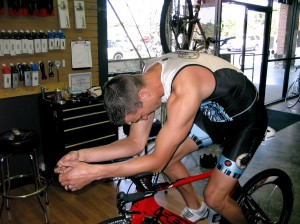
Bryan Sobey of Ride On Multisport

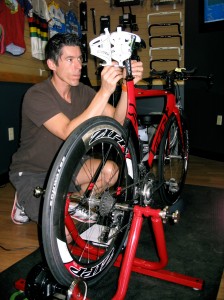
I’ve always been a little bit resistant when it comes to bike technology in triathlon.  After all, the most important thing is the engine, not the machine, right?  Well, these days, it turns out that the machine is pretty important too.  A quick look at any Ironman results will show you that while swim and run times have stayed fairly constant since the late 80’s, bike splits have fallen dramatically over the last few years.  Even more importantly, many athletes have reported having faster times on the bike with lower power outputs after refining their choice of equipment and position on the bike.  That means going faster with less work.  Who could argue with that?  So what’s a triathlete to do, rush out and buy a $10,000 super bike at the first opportunity?  No so fast.  One of the most common mistakes that I see among triathletes is picking a bike just by the price tag, assuming that more expensive means more speed.  But keep in mind that just because a bike costs a lot of money doesn’t mean that it’s the right bike for you, and no bike is going to allow you to achieve peak performance unless it fits.  The solution is to get some expert advice: seek professional help when you select your bike, and get a professional fit to ensure maximum performance on your new machine.

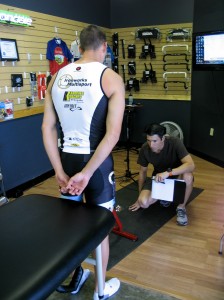
This past week I was able to observe a bike fitting for Jeremy King, an athlete that I coach, at Ride On Multisport in Anderson, SC.  The fitting was conducted by Bryan Sobey, who is a Serotta and Retul certified bike fitter.  This brings me to another point: not all fittings are created equal.  If you decide to go for a professional fitting, make sure that you’re working with a certified professional.  Serotta and Retul are two of the best certifications.  Bryan started the session by checking for anatomical issues and restrictions in flexibility and range of motion.  It’s important to remember that flexibility is a key factor in bike fit, and that you can only set the front end of your bike up as low as you can go while maintaining a flat back.  After Jeremy got on the bike we checked some numbers on the Computrainer and identified areas with room for improvement; with a few adjustments Bryan was able to increase his power output by about 10 watts.  We even threw on an Osymetric chain ring on the front, which was quite interesting, but that’s enough  of a subject for a whole other post.

This was just the first step in Jeremy’s fitting, we’re hoping to get him on the Retul in the next couple of weeks, and I’ll write an update after that session.  But after the initial step of the fitting I have to say that I would consider it an essential step for every serious triathlete.  If you invest your hard earned money into buying a great bike, and you invest your time into training hard to prepare your body, why not make the most of it?  Thanks for reading, and stay tuned for a follow up post on the Retul fitting!


Raw Gluten-Free Superfoods


Ironworks Multisport Triathlon Tips: K-Swiss Blade Light Review

As busy as I stay with my coaching business, I’m still out training every single day, not only because I love the sport but because I find that it keeps me in touch with what’s going on in the triathlon world.  In my effort to help bring you the best free triathlon tips, I’m going to start to offer some product reviews of things that I like and use every day.

I’ve been loyal to a certain brand of running shoes for over a decade.  They sponsored my college track and cross country team, and I had a shoe deal with them while I was racing professionally.  I have to pay for their shoes now, but I’ve stuck with them for a long time because they supported me.  But I think I may have to think about switching.

Like practically everyone in triathlon, I’ve seen how many pros have been switching to K-Swiss running shoes over the past few years.  I grew up thinking of K-Swiss as purely a tennis shoe, so I guess I’ve been a bit late to jump on board with them as a running shoe.  Well, I’m glad that I’ve finally caught up with everyone else.  I just started running in the K-Swiss Blade Light and it might just be the most comfortable shoe I’ve ever worn.  Starting from the ground up, the material for the outsole is pliable, but firm enough for most surfaces.  The insole stays put even during faster tempo paced runs and speed work.  Where the shoe really shines is the uppers, which I love for what they don’t have.  I’ve been plagued by blisters on my arches for years because of all the cosmetic stuff that shoe companies feel that they need to plaster all over their shoes.  K-Swiss hasn’t put anything over the arch so there’s no stitching to rub the inside of your foot, and that means  your feet stay happy and blister free.  The toe box is roomy and comfortable, the laces are a unique design that stays tied and doesn’t slip, and the shoes weigh in at a light and responsive 9.6 ounces.  I find them to be perfect for training and also long distance racing. They do seem to run slightly large, so you may consider ordering a half size smaller than your regular shoe.

Thanks for reading my product reviews and triathlon tips, please be sure to come back soon for more great free triathlon training information!

Beginner Triathlon Tips: Bike Training Tips From Ironworks Multisport

The second discipline of every triathlon, the bike, differs in a very important way from the swim and the run: your performance depends a great deal not just on your body, but on your equipment.  I’m going to try to narrow down some of the choices for you in this blog post, and offer you some beginner triathlon bike tips that will get you out on the road safely, economically, and most importantly, help you get from the swim to the run in the shortest amount of time possible!  Of course equipment plays a role in swimming and running too.  Your wetsuit or swim skin can have a significant impact on your times in the water, and getting the right running shoes and clothing is essential to a superlative run split.  But nowhere else will your choices of equipment have quite the same impact on your race as they will on the bike.  So what equipment will you need to get started?
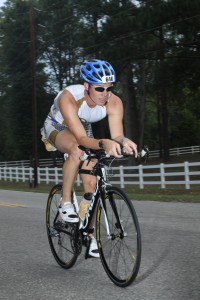
Triathlon Tip #1: The Bike.  Of course, the most important piece of equipment that you are going to need is a bike.  That much is obvious, but deciding on which bike for you is not so easy.  There is an absolutely astounding array of bike equipment out there, and you probably already know that most of is also astoundingly expensive.  I bought my first triathlon bike right after I graduated from college.  Up until then, I’d gotten by borrowing rides from friends and friends of friends.  But after graduation, I took every bit of money I had (including the money my parents gave me for a class ring) and headed down to the local bike shop and told them I needed a bike, pedals, and a new pair of cycling shoes.  I was completely broke, but I could ride!  So this raises one of the most important issues when shopping for a bike: money.  You can easily spend $10,000 or more on a carbon fiber time machine these days, but there are a lot of decent bikes that start at about $1500.  Less than that, and you’re going to get something that will provide you with more frustration than pleasure.  When you start spending above $3000, you’re getting into pretty diminishing returns.  My triathlon bike tip is to stick to the $1500-$3000 price range.  You’ll get all the bike you need without having to take a second mortgage or sell a kidney.  Don’t forget that the most important part of the bike is the engine: You!  However, you and your bike will be spending a lot of time together, so do some research, make sure your bike fits, and pick the right one.

Triathlon Tip #2: The Helmet.  Without a doubt, the second most important piece of triathlon bike equipment that you can buy is a good helmet.  This is a major safety issue, so don’t go cheap!  My most important triathlon bike tip is to get a good helmet, and wear it every single time you get on your bike.  This is an issue I take seriously.  When I was eight years old I spent New Year’s Eve waiting on news about my sister from the emergency room after she’d fallen from a horse and fractured her skull.  She spent a couple of days in a coma, but thankfully made a full recovery.  Many people with head injuries aren’t so lucky, so even if you like the feeling of the hair blowing in the wind as you fly down the road, you’re going to need to get used to that helmet.

Triathlon Tip #3: Sunglasses.  They’re not just about looking cool!  Sunglasses help block the glare of the sun, and also debris that you’ll encounter on the road.  You’ll find out just how much dust, dirt, and pollen there are in the air during a long ride without eye protection, so get some decent shades and save some wear and tear on your eyes.  You may even look a little cooler on the bike, and the road will definitely look a lot cooler from your bike.  Just remember one simple rule: if you get some over the top Mario Cippolini-Style Italian rock star glasses, save them for the bike.  Unless you happen to actually be an Italian cycling super star, the further you get from your bike, the bigger the geek you’re going to look like.  Same rule applies to bike shorts.

Triathlon Tip #4: Shoes and Pedals.  If you’re getting serious about cycling, you’re going to need to invest in a good pair of clipless pedals and cycling shoes.  Somewhat confusingly, “clipless” pedals actually refer to the kind of pedals that your feet actually attach to, like with ski bindings.  Before clipless pedals, cycling pedals had straps that ran over the tops of the athletes shoes and attached their feet to the pedals.  The straps were called “toe clips”, hence shoes without these straps became known as “clipless”.  These days hardly anyone ever rides with toe clips, so when you talk about pedals, cyclists will understand that you’re talking about clipless pedals.  There is a definite advantage to being able to attach your feet to the pedals, that way you can apply pressure to the pedels through 360 degrees of the pedal stroke, not just as you’re pressing down.  They’re not cheap, but if you’re serious about cycling they’re the only way to go.

Triathlon Tip #5: GPS/Bike Computer:  Once you start logging some miles on the bike, you’re going to want to be able to track your progress.  You’ll want to know how far you’ve ridden, what your average speed was, and how long your ride took you, at the very least!  I still remember when I was about 13, one of my friends got a bike computer and we all thought it was the coolest thing ever.  I grew up out in the country, so whenever I got together with friends we usually ended up running, hiking through the woods, or riding bikes.  Once we got a computer to use, every weekend became a new challenge.  If we rode 30 miles one weekend, we had to ride 35 the next.  We got up to 50 mile rides, fueled by Coke and Snickers bars from the gas stations we passed.  And that was riding an old steel mountain bike that weighed about 35 pounds!  We had some great times though, and the lesson I learned from that was that tracking your training and constantly challenging yourself keeps things fun and interesting.  Tracking your training and recording your progress gives you constant motivation to get out the door to train, and the best way to measure your performance on the bike is getting a good cycling computer.  The new GPS options are more expensive, but work great and will most often enable you to upload workout data to your computer so that you can track it with a program like TrainingPeaks.

Triathlon Tip #6: Comfortable Cycling Clothes:  Notice I didn’t say “expensive cycling clothes”!  As with anything in triathlon, you can spend a fortune on clothes for the bike, a top of the line pair of cycling shorts can run well over $200 these days.  If you don’t happen to have a couple of grand lying around that you’re just dying to spend on looking awesome on the bike, don’t despair.  You can get plenty of good, functional clothes without spending a fortune.  The first pair of cycling shorts I got was also the cheapest pair, and I can still wear them.  They’ve outlasted many other pairs of shorts that cost twice as much.  And besides, the most important thing is how fast you ride the bike, not the labels on your clothes, you hardly need to read triathlon bike tips to know that!  But getting some decent cycling clothing for a variety of weather condition will make your rides much more comfortable and enjoyable, and if you shop smart it won’t break the bank.

Please visit ironworksmultisport.com again soon for more free triathlon tips, workouts, and information.  Thanks for reading!
Swim Training Beginner Triathlon Tips: Equipment For Swim Training

Swim Training Tips With Land HeintzbergerIf you’re like most beginner triathletes, the swim can be your biggest challenge.  Many triathletes approach their swim training with a certain amount of dread, looking at each workout as another battle with the black line of the bottom of the pool.  Fortunately, with a little imagination and creativity, swimming can actually be one of the most fun sports to train for. I’ve been a swim coach for 15 years, and in that time I’ve worked with hundreds of swimmers ranging in ages from six months to seventy years.  I’ve coached for big age group teams and summer league teams where I’ve had to fill 4 hours of practice time every day, and anyone who’s tried to keep 120 kids busy for 4 hours a day knows that you’ve got to get creative!  There are so many variables to work with in swim training that you can come up with endless possibilities for workouts.  The main variables are equipment, intervals, strokes, and drills.  I’m going to discuss the first one today, and I will delve into the others in future posts.

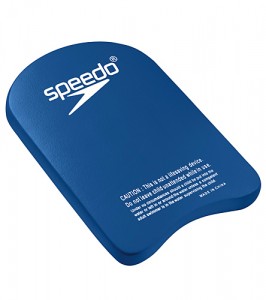
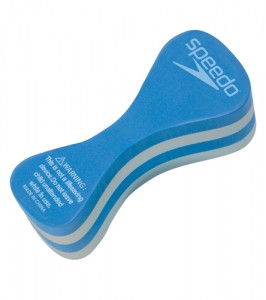
There are several essential pieces of equipment that each swimmer should own: a kickboard, a pull buoy, two sets of hand paddles, a pair of fins, and an ankle band.  There are many, many other items out there, and they all have their uses, but there are the core items that you should take to the pool for every swim.  I suggest getting a mesh equipment bag to keep all your gear together.  Here’s a bit more about each different item:

Swim Training Triathlon Tips

Kickboard:  If you want to become a better swimmer, the first step is to become a better kicker, so grab your kickboard and get to work!  You should spend up to 20% of each practice working on your kick.  The right way to do it is to keep your body straight and tall, hold your kickboard with both arms and keep them extended straight out in front of your body with the board flat on the surface of the water.  The amplitude of your kick should be small, just wider than the width of your body, and your heels should just barely brush the surface of the water.  Kick fast enough that you make the water boil, but don’t make a huge splash, that just means that you’re kicking air.  Start with manageable distances, if you can only maintain your form for a 25, then start with 6-8×25 and build up from there.  You don’t need to kick like you’re swimming the 50m freestyle in the Olympics, but a strong kick can boost your propulsion by 10-15%, and a solid kick is essential to maintaining balance and body position, and generating rotation.

Pull Buoy:  If most triathletes hate their kickboards, it’s also true that most of them love their pull buoys.  However, this also makes the pull buoy the piece of equipment that is most often abused by triathletes.  I’ve worked with athletes during their swim training who would physically resist anyone who tried to take their pull buoy away, claiming that it prepared them for wetsuit swims, while always maintaining that as a triathlete they didn’t really need to kick anyway.  What really happens when you get too dependent on your pull buoy is that you don’t learn proper balance and body position, and you never develop a propulsive kick.  The proper use of a pull buoy is to develop technique.  The buoy puts your body in a more horizontal position in the water by keeping your hips high, and allows you to focus on the technique of your pull without distractions.  Use a pull buoy sparingly, and only as an aid to developing proper technique, never as a crutch for a poor kick or an improper body position.

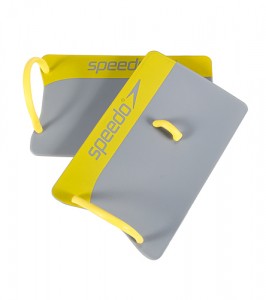
Hand Paddles:  After pull buoys, hand paddles are probably the piece of equipment that gets abused the most.  I have to come clean here and admit that hand paddles are my crutch of choice, and there’s been many times during swim training where I’ve been struggling to make the interval and reached for my hand paddles.  I’ve caught my share of abuse from training partners over this!  But when used properly, hand paddles are a great training tool.  I recommend having two different sizes during swim training.  Use a larger paddle for fast 25’s and 50’s to develop power and speed, select a smaller paddle for drills and technique work to help refine your pull and feel for the water.

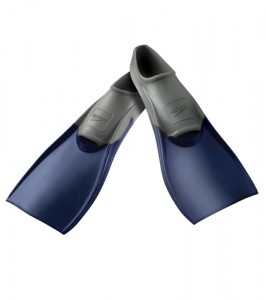
Fins:  Fins are great for both building strength and developing technique.  Getting the right size is important though, you don’t want giant fins meant for deep sea diving.  Something like Finis Zoomers are about right for most athletes.  Putting your fins on for a sprint set will give you the feeling of smooth and effortless speed in the water, something we’d all like to have all the time!  Fins are also great for drill sets, where they allow you get the feeling of a strong, propulsive kick which helps you to generate rotation and maintain a high body position in the water.  Fins help you to achieve the feeling that you’re striving for when you’re not wearing them.  Just make sure that you use them sparingly and don’t let them become a crutch for faulty technique and balance.

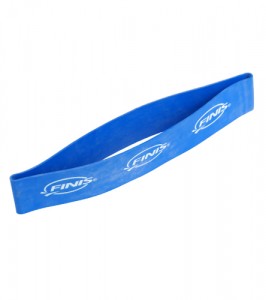
Ankle Bands:  The final piece of equipment that you need is also the one that most people avoid.  Swimming with an ankle band is tough!  But triathlon swim training is as much about toughness and strength as it is about technique and efficiency, you’ve got to have the strength to power through whatever the swim throws at you.  Doing some swims with ankle bands will help you build that power.  My old swim training coach used to make ankle bands for us by cutting up old inner tubes, but you can get one that will look a little more presentable at masters practice by picking up a FINIS Pulling Ankle Band.  Start out with some short repeats, you’ll be amazed how hard it is initially just to swim a 25 with an ankle band.  You can also use a band and a buoy at first to help get comfortable.  When you get to the point where you build up to some longer swim and can do 100’s and 200’s with a band, you’ll be amazed at the difference it will make in your open water swimming.

Triathlon Swim Training Closing

I hope that these triathlon swim training tips will help you to improve the quality and variety of your workouts.  It’s easy so see that if you did a short set with each one of these pieces of equipment that you could make a couple of thousand yards go by pretty fast!  And including these items in your workouts will also help you to improve your technique, build strength, and swim faster.  I’ll be posting lots more information about triathlon training and equipment soon, so please watch this space for more beginner triathlon tips.  Thanks for reading!