Beginner Triathlon Tips: Bike Training Tips From Ironworks Multisport

The second discipline of every triathlon, the bike, differs in a very important way from the swim and the run: your performance depends a great deal not just on your body, but on your equipment.  I’m going to try to narrow down some of the choices for you in this blog post, and offer you some beginner triathlon bike tips that will get you out on the road safely, economically, and most importantly, help you get from the swim to the run in the shortest amount of time possible!  Of course equipment plays a role in swimming and running too.  Your wetsuit or swim skin can have a significant impact on your times in the water, and getting the right running shoes and clothing is essential to a superlative run split.  But nowhere else will your choices of equipment have quite the same impact on your race as they will on the bike.  So what equipment will you need to get started?

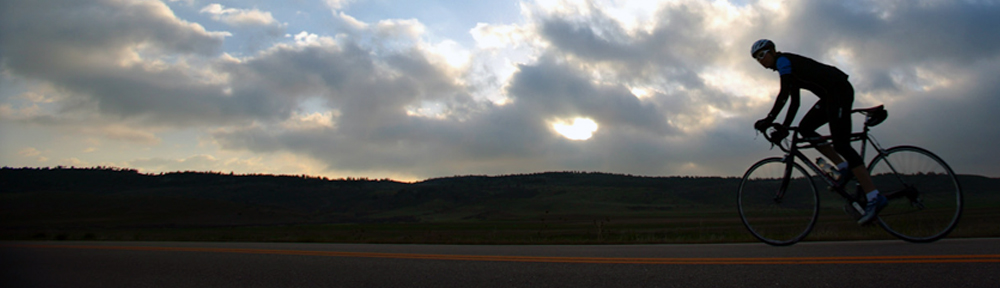
Triathlon Tip #1: The Bike.  Of course, the most important piece of equipment that you are going to need is a bike.  That much is obvious, but deciding on which bike for you is not so easy.  There is an absolutely astounding array of bike equipment out there, and you probably already know that most of is also astoundingly expensive.  I bought my first triathlon bike right after I graduated from college.  Up until then, I’d gotten by borrowing rides from friends and friends of friends.  But after graduation, I took every bit of money I had (including the money my parents gave me for a class ring) and headed down to the local bike shop and told them I needed a bike, pedals, and a new pair of cycling shoes.  I was completely broke, but I could ride!  So this raises one of the most important issues when shopping for a bike: money.  You can easily spend $10,000 or more on a carbon fiber time machine these days, but there are a lot of decent bikes that start at about $1500.  Less than that, and you’re going to get something that will provide you with more frustration than pleasure.  When you start spending above $3000, you’re getting into pretty diminishing returns.  My triathlon bike tip is to stick to the $1500-$3000 price range.  You’ll get all the bike you need without having to take a second mortgage or sell a kidney.  Don’t forget that the most important part of the bike is the engine: You!  However, you and your bike will be spending a lot of time together, so do some research, make sure your bike fits, and pick the right one.

Triathlon Tip #2: The Helmet.  Without a doubt, the second most important piece of triathlon bike equipment that you can buy is a good helmet.  This is a major safety issue, so don’t go cheap!  My most important triathlon bike tip is to get a good helmet, and wear it every single time you get on your bike.  This is an issue I take seriously.  When I was eight years old I spent New Year’s Eve waiting on news about my sister from the emergency room after she’d fallen from a horse and fractured her skull.  She spent a couple of days in a coma, but thankfully made a full recovery.  Many people with head injuries aren’t so lucky, so even if you like the feeling of the hair blowing in the wind as you fly down the road, you’re going to need to get used to that helmet.

Triathlon Tip #3: Sunglasses.  They’re not just about looking cool!  Sunglasses help block the glare of the sun, and also debris that you’ll encounter on the road.  You’ll find out just how much dust, dirt, and pollen there are in the air during a long ride without eye protection, so get some decent shades and save some wear and tear on your eyes.  You may even look a little cooler on the bike, and the road will definitely look a lot cooler from your bike.  Just remember one simple rule: if you get some over the top Mario Cippolini-Style Italian rock star glasses, save them for the bike.  Unless you happen to actually be an Italian cycling super star, the further you get from your bike, the bigger the geek you’re going to look like.  Same rule applies to bike shorts.

Triathlon Tip #4: Shoes and Pedals.  If you’re getting serious about cycling, you’re going to need to invest in a good pair of clipless pedals and cycling shoes.  Somewhat confusingly, “clipless” pedals actually refer to the kind of pedals that your feet actually attach to, like with ski bindings.  Before clipless pedals, cycling pedals had straps that ran over the tops of the athletes shoes and attached their feet to the pedals.  The straps were called “toe clips”, hence shoes without these straps became known as “clipless”.  These days hardly anyone ever rides with toe clips, so when you talk about pedals, cyclists will understand that you’re talking about clipless pedals.  There is a definite advantage to being able to attach your feet to the pedals, that way you can apply pressure to the pedels through 360 degrees of the pedal stroke, not just as you’re pressing down.  They’re not cheap, but if you’re serious about cycling they’re the only way to go.

Triathlon Tip #5: GPS/Bike Computer:  Once you start logging some miles on the bike, you’re going to want to be able to track your progress.  You’ll want to know how far you’ve ridden, what your average speed was, and how long your ride took you, at the very least!  I still remember when I was about 13, one of my friends got a bike computer and we all thought it was the coolest thing ever.  I grew up out in the country, so whenever I got together with friends we usually ended up running, hiking through the woods, or riding bikes.  Once we got a computer to use, every weekend became a new challenge.  If we rode 30 miles one weekend, we had to ride 35 the next.  We got up to 50 mile rides, fueled by Coke and Snickers bars from the gas stations we passed.  And that was riding an old steel mountain bike that weighed about 35 pounds!  We had some great times though, and the lesson I learned from that was that tracking your training and constantly challenging yourself keeps things fun and interesting.  Tracking your training and recording your progress gives you constant motivation to get out the door to train, and the best way to measure your performance on the bike is getting a good cycling computer.  The new GPS options are more expensive, but work great and will most often enable you to upload workout data to your computer so that you can track it with a program like TrainingPeaks.

Triathlon Tip #6: Comfortable Cycling Clothes:  Notice I didn’t say “expensive cycling clothes”!  As with anything in triathlon, you can spend a fortune on clothes for the bike, a top of the line pair of cycling shorts can run well over $200 these days.  If you don’t happen to have a couple of grand lying around that you’re just dying to spend on looking awesome on the bike, don’t despair.  You can get plenty of good, functional clothes without spending a fortune.  The first pair of cycling shorts I got was also the cheapest pair, and I can still wear them.  They’ve outlasted many other pairs of shorts that cost twice as much.  And besides, the most important thing is how fast you ride the bike, not the labels on your clothes, you hardly need to read triathlon bike tips to know that!  But getting some decent cycling clothing for a variety of weather condition will make your rides much more comfortable and enjoyable, and if you shop smart it won’t break the bank.

Please visit ironworksmultisport.com again soon for more free triathlon tips, workouts, and information.  Thanks for reading!

Beginner Triathlon Tips: Triathlon Swim Workouts and Drills for Winter Training

January is a great time to be a triathlete.  Athletes are beginning to plan their seasons and ramp up their training with triathlon tips and tricks, the whole year stretches out before us with new opportunities to challenge ourselves and to take steps towards reaching our goals and realizing our full potential.  For most athletes, the area in which they have the most room to improve is the swim, and this is the perfect time of year to get in the water and build the endurance that will help you to use the swim to position yourself for a strong performance on the bike and run.  In triathlon, your fitness in the first half of the race directly impacts your fitness in the second half of the race, meaning that no matter how fit you are for the run, you won’t be able to use that fitness effectively until you are strong enough to attack the swim and the bike without accumulating an excessive amount of fatigue.  Here are some swim sets that I’ve used over 15 years of coaching swimmers of all levels, from beginners, to age group champions, to Ironman triathletes.

1. 4×400 with a 1 minute rest interval.  Swim the first 400 with paddles, the second 400 with paddles and a buoy, the third 400 with just a buoy, and the fourth 400 with no equipment.  Depending on your fitness, you can alter the distance of the repeats to as short as 100 or as long as 800.  Switching the equipment up provides varity and also changes up the workload on your muscles.

2. 8×100 with a 15 second rest interval.  On the first 100, swim with a paddle on your right hand only, on the second 100 swim with a paddle on your left hand only, on the third 100 swim with paddles on both hands, on the forth 100 swim with no equipment.  Repeat this sequence twice.  For a longer swim, you can swim 200’s instead of 100’s.  You can also swim this set substituting fins instead of paddles.  This is a great way to improve your bio-mechanical awareness and your feel for the water.

3. 10×150 with a 20 second rest interval.  For each 150, kick with a kick board for the first 50, then swim the last 100.  For the kick, really go for it and kick hard!  Get your legs going and get your heart rate up, then cruise the 100 swims at a comfortable pace, concentrating on long strokes and perfect technique.  These swims help to simulate the feeling of triathlon swim starts, where your heart rate goes sky high and your way out of your comfort zone, and you need to settle into a steady pace while you swim.

4. 5×300 with a 45 second rest interval.  Swim the first 50 as right arm pull, the second 50 is left arm pull, the third 50 is catch up drill, then build over the last 150 (think of it as 50 easy, 50 medium, 50 fast).  This set was a favorite of my club coach, and I’ve been using it for years.  It starts you off with some drills to get you thinking about technique, then you have to go right into a progressive 150, so you’re also building speed and endurance.

5. 8×200 with a 30 second rest interval.  For each 200, swim the first 50 breathing every 2 strokes, the second 50 breathing every 3 strokes, the third 50 breathing every 4 strokes, and the forth 50 breathing every 5 strokes.  This one challenges your breath control and bilateral breathing skills.  Both of these are extremely important for triathletes!  When you’re in the open water being able to breath off both sides is a great asset when you’ve got a swimmer to one side of you who keeps splashing you in your face.  Also, having good breath control can help you to stay calm if you miss a breath when a wave hits you in the face right when you’re trying to breath.  It’s no big deal when you have the confidence to take another couple of strokes and get back into your rhythm.

Give these sets a try and have some fun!  Also, make sure to have the proper swimming gear when you train and race, check out my blog post on essential swim gear right here.  Thanks for reading, please come back soon for more of my beginner triathlon tips!

Triathlete Height to Weight Ratios for 2001-2010 Men’s Ironman Hawaii and ITU Olympic Distance World Champions

For some of you guys who have already been following my blog, you may have seen my highly unscientific survey of height to weight ratios of male and female elite triathletes.  Since those blogs posts took random samples from across the sport, I didn’t think they really said much about specific height to weight ratios for Ironman and Olympic Distance triathlon.  I thought a much more interesting survey would be to take the men’s and women’s champions from Hawaii over the past ten years, and compare them to the men’s and women’s ITU Olympic Distance World Champions.  So here are the men, and I think this does make a fairly interesting comparison.  Surprisingly, Ironman athletes appear to be slightly taller and heavier than their Olympic Distance counterparts.  I would love to have people comment on this and possibly share some viewpoints on why this is the case.  Also, it would appear that if you want to find your ideal Ironman weight (at least according to the height to weight ratio that on average has been most successful over the past decade), you’d need to multiply your height in inches by 2.25.  I’m 6’2″, so in my case I’d multiply that by 2.25 to find that my ideal Ironman weight should be about 166 pounds.  So, four pounds to go before the season begins, then!

MEN’S IRONMAN HAWAII CHAMPIONS 2001-2010

Tim Deboom: 5’11”/155 lbs=2.18 pounds per inch of height

Peter Reid: 6’3”163 = 2.17

Normann Stadler: 5’11”/167=2.35

Faris al Sultan: 5’10”/158=2.26

Chris McCormack: 5’11”/171=2.41

Craig Alexander: 5’11”/150=2.11

Average: 2.25

MEN’S ITU OLYMPIC DISTANCE WORLD CHAMPIONS 2001-2010

Peter Robertson: 5’8”/132=1.94

Ivan Rana: 5’8”/135=1.99

Bevan Docherty: 6’2”/154=2.08

Tim Don: 5’8”/142=2.09

Daniel Unger:6’1”/165=2.32

Javier Gomez: 5’9”/151=2.19

Alistair Brownlee: 6’0”/154=2.20

Average: 2.12

*Please remember that this is for informational and entertainment use only!  All the information that I’ve listed here was found on the internet, which doesn’t necessarily guarantee its reliability.  I’ve only put this together as a fun project that I thought would be interesting to read about, please don’t go and do anything crazy to lose weight to get to your “ideal” height to weight ratio, as I don’t believe that there really is such a thing.  If you notice, there’s a pretty wide varience even between the pros.  Be smart, be healthy, and train happy.


Free Shipping On All Orders Over $48.95

Beginner Triathlon Tips: Single Leg Drills for strength, balance, and stabilty.

Here are a few triathlon tips to make each run a little more productive.  By performing these simple drills, you can improve functional strength in your feet and ankles, and improve your stability. These drills also prepare your body and mind for the workout to come, and help make your workout more effective from the very first step! Here’s the routine:

Before your run, do two to three sets of the following drills:

  1. One Leg Hops: Balance on one leg, then hop 12 inches forwards and 12 inches backwards 10-15 times. Then on the same leg hop 12 inches right then 12 inches left another 10-15 times. Repeat the drill with the opposite leg. Take 30 seconds rest interval (RI) between sets.

  2. Square Hops: Balance on one leg, then hop 12 inches forward, 12 inches to the right, 12 inches backwards, and 12 inches to the left. Go around the square three times, then switch legs and perform the drill with the opposite leg. Take a 30 second RI between sets.

  3. Forwards and Backwards One Leg Hops: Balance on one foot, then take 10-15 hops forwards. Then, still facing the same direction, immediately take the same number of hops backwards. Do the same drill with the opposite leg. Take 30 seconds rest between sets.

Take a 2-3 minute RI between exercises. For all drills, strive to stay light on your feet (or foot, as it were). Your foot should strike the ground slightly behind the ball of your foot, and the ball of your foot should land directly beneath your knee. Try to let your foot stay on the ground only for the shortest amount of time possible, like you’re jumping on a scorching hot pool deck in the middle of summer. These drills are great for improving balance, foot and ankle strength, and secondary supportive muscles throughout your lower body. Include these before each run and your form and strength will be sure to improve!

Height and Weight for Elite Female Triathletes

Okay, so as promised here’s part two of the comparisons of height and weight for elite triathletes.  I’ve taken the old rule of thumb for runners that they should have two pounds of weight per inch of height, and in the last blog entry I calculated the height to weight ratio of some of the top male triathletes.  So here are the height to weight ratios of a few of the top female pros:

Chrissie Wellington:  5’8″, 133 lbs: 1.95 lbs. per inch.

Natasha Badmann:  5’6″, 115 lbs: 1.76 lbs. per inch.

Desiree Ficker:  5’7″, 125 lbs: 1.86 lbs. per inch.

Michelle Jones: 5’10”, 133 lbs: 1.90 lbs. per inch.

Mirinda Carfrae: 5’3″, 114 lbs: 1.81 lbs. per inch.

Yvonne Van Vlerken: 5’3″, 125 lbs: 1.98 lbs. per inch.

Emma Snowsill:  5’3″, 105 lbs: 1.66 lbs. per inch.

Vanessa Fernandez:  5’6″, 126 lbs.: 1.90 lbs. per inch.

Laura Bennett:  5’10”, 125 lbs.:  1.78 lbs. per inch.

Erin Densham:  5’6″, 112 lbs.:  1.72 lbs. per inch.

Michelle Dillon: 5’8″, 146 lbs.: 2.14 lbs. per inch.*

(After I posted this, it was brought to my attention [Thanks, Jackie!] that Michelle Dillon’s correct weight is 125 lbs, which puts her ratio at 1.83.  That’s a lot lower, but still very slightly higher than Laura Bennett, so I think that my comment below still has some validity).

Some interesting things that I noticed were that the lightest athletes weren’t necessarily the best runners.  And also, some of the lightest athletes were the best swimmers, for example Laura Bennett, one of the leading swimmers on the World Cup Circuit, has a height to weight ratio of 1.78 lbs. per inch, while Michelle Dillon, one of the leading runners on the World Cup Circuit, has a ratio of 2.14 lbs. per inch.  So I guess the conclusion that I would draw from this information (and please keep in mind that this is only based on information I found on the internet, which is in no way guaranteed to be completely accurate, at best this is a rough impression) is that there are many factors that are more important than weight as determiners of performance.  So rather than starting your new year with goals of weight loss, maybe a better way forward would be to consider improving your strength, perfecting your technique, and improving you mental skills.  I’ll be writing more about all that later!  Until then, be safe, be healthy, keep smiling, and above all, never give up on your dreams!  Train happy!


Height to Weight Ratios of Elite Male Triathletes

People often ask me what they should weigh to race their best.  I’ve never really had an exact answer to give, but the question got me thinking recently.  There are a lot of reasons to try to optimize your weight, and the off season is a good time to lose a few pounds in preparation for the upcoming season.  I’ve always found it much easier to lose weight when I don’t have to worry about staying fueled for my big workouts.  Why should you lose some weight?  Here are some of the best reasons:

1.Less weight means a higher VO2 max.  When you have less body mass, it’s easier for your body to transport oxygen to all your cells. 

2. Less weight also improves thermodynamic regulations, which means that your body can cool itself more efficiently in hot weather.

3. An old rule of thumbs says that you can improve your mile pace by 3-4 seconds per mile for every pound that you lose, so if you loose 10 pounds that means up to 30-40 seconds per mile (this is not a scientific rule, however, so don’t hold me to this one!).

So, what’s the best weight?  I’ve always heard that an ideal weight for runners is two pounds of body weight per inch of height, so I decided to do a little research to find the height to weight ratio of some top elite triathletes.  Here’s what I came up with:

Craig Alexander: 5’11”, 150 lbs.: 2.11 pounds per inch

Chris Lieto: 6’0″, 160 lbs.: 2.22 pounds per inch

Michael Lovato: 6’0″, 170 lbs: 2.36 pounds per inch

Andy Potts: 6’2″, 175 lbs.: 2.33 pounds per inch

Andreas Raelert: 6’0″, 159 lbs.: 2.20 pounds per inch

Michael Raelert: 6’2″, 163 lbs.: 2.20 pounds per inch

Matt Reed: 6’5″, 180 lbs.:  2.34 pounds per inch

Dave Scott: 6’0″, 162 lbs.: 2.25 pounds per inch

Average: 2.25125

So it appears pretty consistant that the height to weight ratio of the top male pros is about 2.25 pounds per inch of height.  Keep in mind that this is an informal survey and that I relied on information found on the internet, which is not guaranteed to be accurate, but I think it’s reasonably close.

So, now you can take a look at your own height to weight ratio and see if any improvements can be made!  Good luck!  And lest you think that I forgot all about women, check back next week and I’ll put together a list of some of the top female triathletes.

Happy Training!